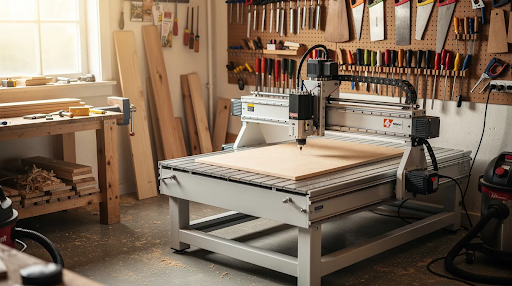
A woodworking CNC machine was once industrial equipment that required dedicated floor space and a six-figure budget. That changed dramatically between 2024 and 2026. Today, compact systems fit against a garage wall, and entry-level models cost less than a quality table saw and jointer combined.
This guide covers what matters when choosing a CNC for wood projects, how to match machine size to your actual workflow, and what accessories you need to budget for beyond the machine itself.
Key Takeaways
- Modern woodworking CNC machines (2024–2026 models) give small shops, schools, and home garages access to precise, repeatable cutting and carving that previously required industrial equipment. Tolerances of ±0.005 inches are achievable on rigid frames with proper setup.
- Machine rigidity, work area (e.g., 24” x 24” vs 4’ x 8’), and vendor support matter more than brand hype when selecting a CNC router for woodworking.
- Buyers must budget for dust collection, tooling, software, and workholding in addition to the machine itself—plan for roughly 1.5x the base machine price as your total investment.
- Simply Technologies offers a structured product progression from entry-level to production-grade systems (SIMPLY → DISCOVERY → PERFORMANCE → PERFORMANCE ATC), along with education programs for schools. Explore CNC systems here.
- This article provides concrete recommendations, example use cases, and a short FAQ to help you move from curiosity to a realistic purchase plan.
What a Woodworking CNC Machine Actually Does
A woodworking CNC router is essentially a computer-controlled robotic router that can cut, carve, drill, and engrave solid wood, plywood, and MDF with repeatable accuracy. Instead of guiding a router by hand, you design your project in CAD software, generate toolpaths in CAM software, and let the machine execute the operation.
The CNC moves a spinning router bit or spindle along three axes—X (left-right), Y (front-back), and Z (up-down)—following the digital instructions precisely. The result: identical parts every time, whether you’re making one piece or one hundred.
Common woodworking CNC projects include:
- Cabinet parts cut from 3/4” plywood with perfect dados and rabbets
- Decorative 3D relief carvings in walnut or cherry
- Baltic birch shop jigs and fixtures (small shops produce 20-30 identical jigs per hour)
- Classroom STEM projects like topographic map models cut from 1/2” MDF
- Personalized house signs with V-bit lettering
CNC router vs CO2 laser: A router removes material with a spinning carbide bit, while a laser vaporizes material with focused light. Lasers excel at engraving and thin materials under 0.5 inches. Routers handle thicker wood, joinery, and 3D shaping. Many shops use both. For laser options that complement CNC systems, see Simply Technologies laser machines.
Why CNC Belongs in a Woodworking Shop or Classroom
Between 2024 and 2026, CNC adoption surged in small shops, maker spaces, and high schools. Over 40% of new U.S. woodworking businesses now incorporate CNC, driven by compact footprints and falling prices.
Precision and Repeatability
CNC cuts cabinet dados, mortises, and sign lettering to the same size every time. This eliminates the layout and measuring errors that plague hand-tool workflows. When you need 100 identical shelf-pin holes or 20 matching drawer fronts, the machine ensures every part fits without caliper checks.
Creative Potential
CNC unlocks intricate inlays, parametric designs following wood grain, topographical reliefs from DEM data files, and custom furniture joinery. These operations push beyond what hand tools can achieve without fatigue-limited intricacy.
Efficiency Gains
Consider this: batching 20 drawer fronts on a 24×32-inch sheet via nesting software cuts production time from 8 manual hours to 45 minutes, including setup. Material yield improves 20-30% compared to manual sawing because nesting software optimizes part placement.
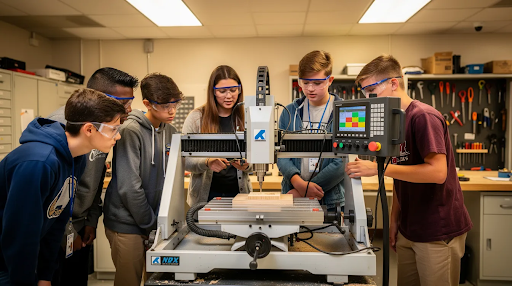
School and Maker Space Value
An ACADEMY-style CNC curriculum—16 sessions progressing from safety and coordinate basics through CAD/CAM production—transforms a CNC from an expensive showpiece into a sustained program asset. Schools report 80% retention rates when CNC integrates into 10th-grade tech courses with math-linked geometry projects.
Key Factors When Choosing a Woodworking CNC Machine
This section helps you narrow from “too many choices” to one or two realistic machine sizes and types. Focus on these factors rather than feature lists.
Machine Rigidity and Construction
Steel frames with linear guides and ball screws resist vibration for chatter-free cuts in maple at 120 IPM feed rates. Aluminum extrusions flex under load, causing wavy edges over 12-inch spans. When evaluating benchtop CNC machines or larger machine options, rigidity determines your actual achievable quality.
What to look for:
- Steel or heavy-wall aluminum frame construction
- Linear rail guides rather than V-wheels
- Ball screws or rack-and-pinion drives for accuracy
Work Envelope
Common sizes range from 12” x 12” (desktop) to full 4’ x 8’ sheet capability. For most small-shop needs and project size requirements, 24” x 24” to 24” x 36” handles 70% of applications without requiring a larger machine.
| Size | Best For |
| 12” x 12” | Small signs, prototyping, hobby carving |
| 24” x 24” | Furniture panels, cutting boards, sign making |
| 24” x 36” | Small commercial batches, classroom projects |
| 4’ x 8’ | Full cabinet sheets, production shops |
Spindle vs Router
Routers (1-2HP air-cooled) are affordable but loud at 90-100dB with 30-minute duty cycles. Spindle power from a water cooled spindle (1.5-3HP, 2.2-4.5kW) offers quieter 75-85dB operation for 8-hour runs, better precision with ER collets under 0.001-inch runout, and extended tool life.
For classroom use or frequent operation in an attached garage, invest in a spindle. The difference in noise and reliability justifies the price.
Drive Systems and Motors
Closed-loop stepper motors with rack-and-pinion drives deliver speeds up to 800 IPM rapids with ±0.002-inch accuracy. Belt-driven systems are prone to backlash errors exceeding 0.010 inches on longer travels. For woodworking, closed-loop steppers balance cost and performance.
Software Ecosystem
Your CNC is only as capable as your design software. Verify compatibility with VCarve, Fusion 360, or similar CAD/CAM packages before purchase. Test trial versions and confirm post-processor support for your specific controller. Mismatched post-processors cause G-code errors that crash jobs.
Support and Training
Phone/remote support, documentation, and structured training matter—especially for first-time CNC adopters. A dedicated support team can troubleshoot setup issues that forums cannot. Simply Technologies positions itself as a technical resource with direct guidance available. Review CNC system details.
Budget Planning
Typical 2025–2026 cost ranges:
- Entry-level: $1,500–$3,000
- Intermediate: $4,000–$7,000
- Production-grade: $8,000–$15,000+
Non-obvious costs to budget:
- Dust collection: $500–$2,000
- Tooling starter kit: $300
- Clamps, spoilboard, workholding: $200–$400
- Surge protection: $50–$100
Plan for approximately 1.5x the base machine price as your total investment.
Choosing the Right Size and Series: From Entry-Level to Production
Not everyone needs a 4’ x 8’ machine. Most small shops and schools start with a mid-sized table and grow over time. A scalable product structure like SIMPLY → DISCOVERY → PERFORMANCE → PERFORMANCE ATC allows users to move up in capability without relearning a new system or switching brands. See specific machine options.
Entry-Level / SIMPLY-Class
Typical envelope around 24” x 24”. Handles softwoods, hardwoods, and plywood. Ideal users: home shops, after-school programs, prototyping labs. These machines offer strong learning value for a beginner and makers who want to start carving without major investment.
Intermediate / DISCOVERY-Class
Larger working area (24” x 36” or 30” x 40”), more rigid gantry, better spindle options. Ideal for small commercial shops producing small signs, furniture components, or dedicated maker spaces with regular use.
Production / PERFORMANCE-Class
For shops consistently cutting cabinet parts, architectural elements, or fixtures. Higher feed rates, industrial controls, and robust construction support 8-hour-per-day operation. Professional shops running 30 cabinet doors weekly benefit from this class.
PERFORMANCE ATC (Automatic Tool Changer)
ATC reduces setup time for operations requiring multiple router bit changes—drilling shelf pins, cutting pockets, and profiling in one job. An 8-12 tool magazine saves 20-40% cycle time on multi-operation parts. Essential for production environments or advanced education labs.
Space considerations: Match machine size to shop or classroom constraints. Account for doorway widths under 36 inches, stairways, and minimum 3-foot clearance around the machine for safe operator movement.
Essential Accessories: Dust, Workholding, and Shop Integration
A CNC without proper dust collection, workholding, and basic shop infrastructure creates frustration and safety issues. These accessories are part of the system, not afterthoughts.
Dust Collection
Fine dust from MDF and plywood poses health risks (OSHA limits 5mg/m³) and ruins surface finish. High-airflow collectors with 4-inch ports at 800-1200 CFM capture 95% with enclosed dust shoes versus 60% with open designs. For compact machines, sealed shop vacs with good filtration work adequately.
Workholding
Secure, predictable fixturing prevents workpiece movement and ensures accurate carving. Common methods include:
- T-track clamps for quick setup
- Vacuum pods for nested sheet goods
- Screws into sacrificial spoilboards
- Double-sided tape for small parts
Tooling and Collets
A basic starter set includes:
- 1/4” upcut spirals for plywood roughing (300 IPM, 12,000 RPM)
- Downcut bits for tearout-free surfaces
- Compression bits for double-sided panels
- V-bits (60-90°) for sign making
- Ballnose bits (1/8”–1/4”) for 3D carving at 0.005” stepover
Quality collets need quarterly replacement to maintain TIR under 0.005 inches.
Spoilboards and Fixtures
Use 3/4” MDF spoilboards surfaced flat with a flycutter. Create simple reusable fixtures for repeat projects—a jig holding cutting board blanks at a fixed origin saves setup time across production runs.
Power and Noise
Confirm voltage (220-240V) and amperage (20-30A circuits) against your shop panel before purchase. Spindles run significantly quieter than routers—critical for garages attached to living spaces or classrooms adjacent to other learning areas.
Education and Training: Implementing CNC Safely in Schools and Maker Spaces
Between 2022 and 2026, North American schools added CNC routers to support STEM, manufacturing, and trades programs. Many struggled with teacher onboarding and program sustainability. Structured curricula solve this.
ACADEMY-Style Curriculum Structure
A 16-session progression moves students from basic safety and coordinate systems through CAD/CAM projects to simple production workflows. This structure includes:
- Teacher training (in-person or remote)
- Step-by-step lesson plans with design software integration
- Aligned safety procedures with controller protocols
- Student assessment and certification pathways
Safety Requirements
CSA-compliant CNC machines with e-stops, interlocks, and guarded rails are required for Canadian schools and strongly preferred in any classroom. Safe operation protocols include PPE requirements, supervised runs only, and clear emergency-stop access.
Cross-Curricular Integration
CNC projects connect across disciplines:
- Math: Coordinate geometry, toolpaths, and feeds/speeds calculations
- Design/Arts: Sign making, sculpture, and engraving projects
- Entrepreneurship: Selling student-made products at school events to fund programs
Schools integrating CNC into 10th-grade tech courses report sustained 80% program retention when students create tangible products. Connect with an education team to discuss implementation—review system options suited to classroom environments.
Practical Steps to Get Ready for Your First Woodworking CNC Machine
This checklist helps you prepare your space and workflow before the machine arrives.
- Assess Your Shop
Measure available floor space (minimum 8×10-foot zone). Verify power availability—120V for smaller machines, 240V for production systems. Check dust collection options and plan material storage near the machine for efficient operation.
- Plan Your Projects
List your first 5–10 realistic CNC projects: house number signs, shop jig sets, simple cabinet boxes, classroom name tags, or a small batch of cutting boards for a craft fair. This list determines machine size and accessory needs. Match your project size to your working area requirements.
- Practice Software First
Download trial versions of VCarve or Fusion 360 and complete basic tutorials before the machine ships. Setup time should focus on cutting, not learning software from a box with no experience.
- Establish Safety Protocols
Create rules before the first cut:
- Required PPE: eye protection, hearing protection, dust masks
- No unattended runs (machine never operates without an operator present)
- Clear emergency-stop access
- Written startup/shutdown checklist
This applies especially in schools where multiple users operate the equipment.
- Connect With Support
Review system options at Simply Technologies CNC products and call 800-288-2961 to discuss project needs, shop constraints, and training plans directly with a technical specialist. Getting advice before buying prevents costly mismatches between capability and requirements.
FAQ
What size woodworking CNC machine should I buy for a one-car garage shop?
Most 2025–2026 garage woodworkers find a 24” x 24” to 24” x 36” working area optimal. This size handles signs, furniture components, and cutting boards while fitting on a heavy bench against one wall. Leave at least 3 feet of clearance on the front and one side for material loading. If you routinely cut larger panels, look for a machine that can tile 24” x 48” sections through software, even in tight spaces. Compact options like Onefinity CNC or similar benchtop systems work well for this setup.
Can a woodworking CNC router cut materials other than wood?
Yes. Most woodworking CNC routers handle MDF, plywood, and plastics like acrylic and HDPE with appropriate tooling and adjusted feeds/speeds. Light aluminum work is possible on rigid machines with conservative passes, but production metal cutting requires purpose-built equipment. Education-focused and small-shop systems are primarily optimized for wood materials—confirm off-label material use with the manufacturer. A rotary axis attachment can also add capability for cylindrical workpieces.
How steep is the learning curve for CNC woodworking if I’m used to hand tools?
The curve is front-loaded: expect a few weeks to become comfortable with CAD/CAM and basic machine operation. Start with simple projects like name signs and flat-profile cuts before advancing to joinery and 3D carving. With structured training like a 16-session curriculum and good vendor support, the time from unboxing to productive work drops significantly—some programs report students completing quality projects within 6-8 sessions. Speed and precision improve steadily with practice.
Is a CO2 laser a replacement for a woodworking CNC router?
No—they’re complementary tools. CO2 lasers excel at engraving, fine detail, and materials under 0.5 inches thick. CNC routers handle thicker solid wood, structural joinery, and 3D shaping. A typical setup: use the CNC router to cut cabinet doors, then the laser to engrave logos or decorative elements. For compatible CO2 systems, see Simply Technologies laser machines.
When does it make sense to invest in an automatic tool changer (ATC)?
ATC makes sense when your business runs jobs with multiple tool changes per part—pocketing, profiling, and drilling operations—on a repeat basis. If you’re cutting 30+ cabinet doors weekly with shelf-pin drilling, pocket cuts, and edge profiles in one setup, ATC saves 20-40% cycle time. For hobby use or low-volume projects involving one or two bits, manual tool changes remain cost-effective. The next wave of growth typically triggers ATC investment when setup time becomes a production bottleneck in professional shops.