Key Takeaways
- This article is designed for teachers, lab managers, and instructors who want to deliver modern CAD/CAM and CNC training without needing a manufacturing background.
- Simply Technologies focuses on making industrial CNC concepts teachable in school, college, and makerspace environments.
- You will learn how to structure a CNC curriculum, choose hardware and software, and run safe hands on training projects.
- No prior shop-floor experience is required—this guide explains how educators can build confidence step-by-step through structured learning.
- A practical FAQ at the end addresses scheduling, assessment, and how to keep equipment current on a limited budget.
Overview: Why CNC Training for Educators Matters Now
The manufacturing industry is changing fast. Digital manufacturing, automation, and computer-controlled machining have moved from factory floors to classrooms, makerspaces, and STEM labs. Yet a significant skills gap persists: the U.S. Bureau of Labor Statistics projects 7% growth in machining jobs through 2032, with roughly 45,000 annual openings requiring CNC skills. The problem? Only about 25% of community colleges currently offer certified programs in this area.
Secondary schools, colleges, and STEM programs are under increasing pressure to introduce CNC by 2026. Many educators are experts in teaching math, physics, or technology—but they are new to CAD, CAM, and G-code. This creates a real challenge: how do you teach something you have not yet mastered yourself? The answer lies in structured support and the right training resources.
Simply Technologies serves as an education-focused partner that helps institutions translate real factory processes into classroom-ready learning modules. Their approach assumes no prior CNC experience, building on foundational practices like shop safety, blueprint reading, and tolerance interpretation.
Who is this article for?
- High school STEM teachers introducing digital manufacturing
- Community college instructors building CTE programs
- CTE coordinators developing district-wide curricula
- Makerspace managers expanding fabrication capabilities
By the end of this article, you will understand curriculum design, equipment choices, example projects, and professional development pathways that develop skills for confident CNC instruction.
Foundations: Core CNC Concepts Every Educator Should Teach
Before students touch a cnc machine, they need to understand the theory that makes everything work. This section outlines the non-negotiable concepts that should appear in any CNC course, even an introductory one.
Essential concepts to cover:
| Concept | What Students Should Understand |
| Coordinate systems | Work coordinate systems (G54-G59) define program zero relative to the workpiece |
| Cartesian axes | X, Y, Z movements in 3-axis mills; X and Z for 2-axis cnc lathe operations |
| Machine types | Differences between 3-axis mills, 2-axis lathes, and CNC routers |
| CAD vs. CAM vs. CNC | CAD creates the design, CAM generates toolpaths, CNC control executes the program |
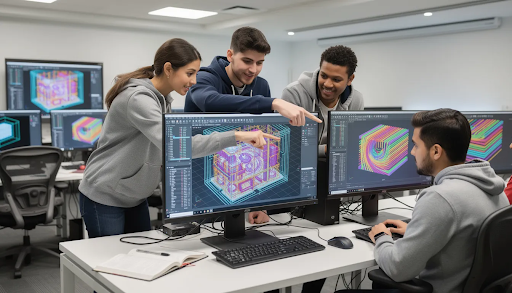
The digital workflow is central to CNC education. Students must understand the complete process: sketch in CAD, generate toolpaths in CAM, post-process to G-code, verify through simulation, and finally run on the cnc machine.
Connect terminology to real examples whenever possible. Show how a simple aluminum bracket moves from drawing to finished part. Have students trace the journey of coordinates, cutting tools, and programmed movements. This concrete approach makes abstract concepts stick.
Simply Technologies recommends using simple diagrams rather than dense text when teaching these foundations. Visual learners—which includes most students—grasp spatial relationships faster when they can see axis directions and tool movements illustrated clearly.
Designing a CNC Curriculum for Schools and Colleges
Curriculum planning should start from learning outcomes. Ask yourself: what should students be able to design, program, and machine by the end of a term or academic year? Working backward from these goals creates a comprehensive structure.
Sample 14-week semester breakdown:
| Weeks | Module | Focus |
| 1-3 | CAD Basics & Safety | Software introduction, machine orientation, PPE requirements |
| 4-6 | Introduction to Toolpaths | Face milling, contouring, drilling cycles |
| 7-10 | Precision Projects | Tolerances, fixtures, multi-part assemblies |
| 11-14 | Design-Build Challenge | Independent project from concept to complete part |
Balance theory sessions with lab blocks. A typical schedule might include two 50-minute classroom periods plus a 2-3 hour lab each week. This rhythm allows knowledge to settle before hands on practice begins.
Assessment should combine digital work (CAD models, CAM setups) and physical parts. Create simple rubrics covering:
- Dimensional accuracy (measured against specifications)
- Surface finish quality
- Documentation completeness
- Safety protocol adherence
Simply Technologies provides ready-to-teach lesson outlines, project briefs, and assessment templates aligned to common STEM and CTE standards. These materials save educators significant preparation time while ensuring industry-relevant instruction.
Introductory Module: From Drawing to First Cut
The first 2-3 weeks establish foundational confidence. Students learn basic CAD sketches, simple toolpaths, and run a supervised first cut on a training-safe machine.
Recommended sequence:
- Create a 2D sketch of a simple plate shape
- Add dimensions and constraints
- Select appropriate cutting tools in CAM
- Generate a face and contour operation
- Simulate the toolpath to check for errors
- Cut foam or soft plastic under supervision
Keep the first project small and fast. Key tags, nameplates, or simple coasters work perfectly—every student can go from concept to part within a single lab session. This immediate success builds momentum and interest.
Prepare visual aids such as step-by-step screenshots and printable checklists educators can post next to the machine. These references reduce questions and build student independence.
Intermediate Module: Precision, Tolerances, and Fixtures
Weeks 4-8 transition students from decorative parts to functional components with basic fits and tolerances.
Topics to include:
- Reference datums and their importance
- Simple jigs and soft jaws for workholding
- How fixture design affects accuracy and repeatability
- Reading and applying tolerance callouts from blueprints
A strong project for this phase involves a small assembled mechanism—perhaps a hinge or clamp—where multiple CNC parts must fit together within specified tolerances. This teaches that precision matters beyond individual parts.
Students should measure their work with digital calipers, comparing results to CAD dimensions and tolerance specifications. This metrology practice connects machining to quality control, a critical manufacturing skill.
Integrating CAD and CAM: Teaching the Digital Side of CNC
Modern CNC operations depend entirely on manufacturing software proficiency. This section explains how to teach students the software skills that underpin digital manufacturing.
Choose a CAD/CAM platform that works for education:
- Accessible licensing for schools
- Cloud-based accounts for flexible access
- Compatible with shared labs and Chromebook environments
- Strong simulation capabilities
Structure exercises progressively: sketching basic profiles, extruding parts, adding fillets and holes, then transitioning those models into a CAM workspace. Each step should have clear success criteria.
Use simulation features extensively in front of the class. Toolpath verification and material removal previews build intuition before anyone presses the cycle start button. Students should see multiple simulations fail—hitting fixtures, gouging parts, or running inefficient paths—so they learn to catch problems before they become expensive mistakes.
Simply Technologies offers training resources that connect specific CAD/CAM workflows to the configuration and capabilities of your institution’s actual machines. This alignment eliminates confusion when students move from software to hardware.
Teaching G-Code Without Overwhelming Beginners
G-code can intimidate newcomers, but it does not need to. The goal is demystifying cnc programming by showing how CAM-generated code maps to simple movements—not asking students to write everything from scratch.
Approach for teaching G-code:
- Pick a short, real program (20-30 lines maximum)
- Annotate key commands alongside a drawing of the part
- Focus on fundamentals: G0 (rapid), G1 (linear feed), G2/G3 (arcs), tool changes, spindle speed
| Code | Function | Plain Language |
| G00 | Rapid positioning | Move fast without cutting |
| G01 | Linear interpolation | Cut in a straight line |
| G02/G03 | Circular interpolation | Cut arcs and circles |
| M03/M05 | Spindle control | Turn spindle on/off |
Have students make small, low-risk edits in a controlled environment. Changing a feed rate or depth of cut, then re-simulating, teaches cause-and-effect without catastrophic results. This builds understanding of manual programming concepts.
Side-by-side views work exceptionally well: CAD model on one screen, CAM toolpath in another window, and corresponding G-code visible simultaneously. This triangulation reinforces how digital design becomes physical reality.
Hands-On CNC Lab: Safety, Setup, and First Projects
Lab safety and machine setup are critical teaching responsibilities. When working with new learners, these cannot be rushed or assumed.
Safety orientation checklist:
- PPE requirements (safety glasses, closed-toe shoes, no loose clothing)
- Emergency stop locations and how to use them
- Machine door interlocks and their purpose
- Instructor expectations for behavior in the lab
- Consequences for safety violations
Demonstrate basic setup steps methodically:
- Power up the machine and verify status
- Home all axes to establish machine zero
- Load cutting tools into the spindle or turret
- Set work offsets using tool offsets and edge finders
- Perform a dry run with the door closed
Start with soft materials like foam, wax, or plastics during early labs. This approach reduces risk significantly while students learn feeds, speeds, and clamping techniques. Mistakes in foam cost cents; mistakes in aluminum cost much more.
Simply Technologies can help schools configure machines, write startup checklists, and design low-risk starter projects aligned with the equipment you own.
Structuring a Safe and Engaging First CNC Project
A template approach works well for first projects. Each student personalizes a simple part—an engraved badge or phone stand—while following a standard machining process plan.
Recommended lab structure:
- Divide students into small groups (4-6 per machine)
- One group operates under direct supervision
- Other groups work on CAD/CAM tasks or metrology exercises
- Rotate throughout the lab period
Create a visual process chart showing the workflow:
Design Approval → Program Verification → Machine Setup → Machining → Deburring → Final Inspection
Schedule time for reflection at the end of each lab. Have students write a brief process summary noting what worked, what they would change, and questions for next time. This metacognition accelerates the learning experience.
Choosing CNC Equipment and Tooling for Education
Hardware decisions must balance budget, safety, and the kinds of projects you want to run. Getting this right sets up your program for long-term success.
Compact benchtop vs. full-size machines:
| Factor | Benchtop CNC | Full-Size Industrial |
| Footprint | Small, fits in standard classrooms | Requires dedicated shop space |
| Power | Standard outlets | Often requires 3-phase power |
| Capability | Soft materials, light metals | Full range of materials |
| Cost | $5,000-$15,000 | $50,000+ |
| Student access | Higher student-to-machine time | More scheduling complexity |
Consider these additional factors:
- Chip management and cleanup requirements
- Noise levels in shared spaces
- Enclosure quality and safety ratings
- How many students need hands on practice per machine weekly
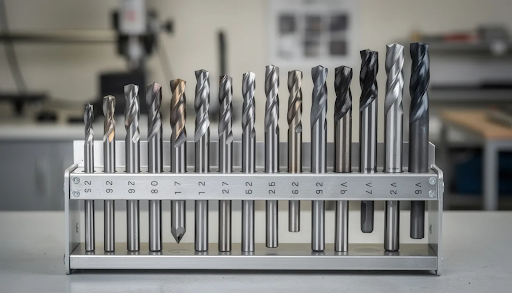
Starter tooling package recommendations:
- End mills in common sizes (1/4”, 1/8”, 1/16”)
- Drill bits matching standard hole sizes
- Facing tools for surface operations
- Quality workholding vises
- Clamps and parallels
- Digital calipers and micrometers
Simply Technologies can advise on building an equipment roadmap, helping institutions start with core machines and expand capabilities as demand grows.
Planning for Maintenance and Long-Term Reliability
Budget time and money for routine maintenance—not just purchase price. Machines that sit broken frustrate students and waste instructional time.
Maintenance schedule:
| Frequency | Tasks |
| Daily | Chip removal, coolant level check, visual inspection |
| Weekly | Lubrication, way wipers check, filter inspection |
| Monthly | Alignment verification, belt tension, software updates |
| Semester | Full calibration, spindle inspection, deep cleaning |
Assign student lab assistants or advanced learners to help with basic upkeep under staff supervision. This turns maintenance into a learning opportunity while distributing the workload.
Keep spare consumables on hand:
- Collets and tool holders
- Replacement inserts
- Cutting fluid
- Common cutting tools that frequently wear or break
Other costs beyond the initial purchase include tooling replacement, materials for student projects, and occasional repairs. Plan for these in your annual budget.
Professional Development: Building Educator Confidence in CNC
Many educators feel uncertain about teaching CNC because they come from math, physics, or general technology backgrounds—not manufacturing. This uncertainty is normal and addressable.
Well-structured professional development can quickly raise confidence. The most effective training mixes online learning with hands on practice on your institution’s own machines. Generic knowledge helps, but machine-specific competence is what you need in the lab.
Plan a training schedule for 2025-2026:
- Summer institutes (40+ hours of intensive training)
- In-service days (focused workshops on specific skills)
- Evening sessions for ongoing development
- Peer observation and mentoring
Support team-based training whenever possible. When multiple instructors, lab techs, and teaching assistants build skills together, the program does not collapse if one person leaves. Shared knowledge creates resilience.
Simply Technologies provides educator-focused workshops, remote coaching, and implementation support tailored to your school’s chosen platforms and course schedules. Their experienced instructors understand classroom constraints and can adapt training accordingly.
From Beginner to Mentor: A Suggested Educator Learning Path
Progress through distinct stages:
- Learner stage: Run pre-built projects, follow established procedures, build basic machine comfort
- Facilitator stage: Support student projects, troubleshoot common issues, adapt existing materials
- Mentor stage: Design original CNC assignments, train colleagues, develop curriculum
Approximate timeframes:
| Stage | Hours Required | Typical Duration |
| Basic operating confidence | 20-30 hours | Summer institute |
| Teaching-ready competence | 40-60 hours | First teaching term |
| Curriculum development ability | 100+ hours | Full academic year |
Keep a simple learning log. Note each new setup, tool, or strategy you try. Track growth and identify topics where extra support is needed. This documentation helps with registration for advanced courses and demonstrates professional development for work experience credit.
Encourage institutions to recognize and reward staff who take the lead in developing CNC capacity. This recognition helps build a sustainable culture of digital manufacturing education and supports machinists entering the workforce with real skills.
FAQ
This FAQ section addresses common questions about implementation details, constraints, and practical next steps for CNC training for educators.
How much CNC content can I realistically fit into a single semester?
A 12-14 week term can reasonably cover basic CAD skills, safe machine operation, several simple parts, and one small final project. Do not attempt advanced multi-axis machining or complex programming in an introductory course.
Simply Technologies recommends focusing on repeatable core workflows students can master thoroughly. The goal is successful completion of the design-to-part process at least once, with genuine understanding—not superficial exposure to many topics.
Prioritize depth over breadth. A student who truly understands one complete workflow will expand that knowledge faster than one who has seen many operations but completed none independently.
What if I don’t have any prior experience with machining or manufacturing?
Many successful CNC educators start from non-manufacturing backgrounds. A person with strong teaching skills and willingness to learn can become a cnc professional instructor through structured training and practice.
Simply Technologies provides step-by-step educator training, including remote sessions that walk through common tasks and answer questions in real time. Their support helps you develop skills progressively rather than expecting instant expertise.
Start with tightly scripted projects where every step is documented. Gradually give students more freedom as your comfort grows. Your subject matter knowledge will develop alongside your classes—and your students will benefit from seeing you model lifelong learning.
Can I integrate CNC projects into existing STEM or engineering courses?
Absolutely. CNC can be embedded into physics, engineering design, and technology classes by using manufacturing projects to reinforce concepts like measurement, geometry, and problem solving.
Integration examples:
- Use a CNC-milled test piece for a materials properties unit
- Have students design and machine components for robotics competitions
- Create precision parts for capstone projects
- Machine fixtures or tools for other programs in the school
Simply Technologies can help map CNC activities to specific curriculum standards and learning objectives already in place. This integration approach often makes CNC easier to justify to administrators than standalone courses.
What class sizes and student-to-machine ratios work best?
Ideal ratios fall around 8-12 students per cnc machine for hands on training courses. Larger groups can work with good scheduling and rotating stations, though the learning experience differs.
Strategies for limited equipment:
- Pair students for collaborative work
- Create simulation stations for CAM practice
- Run extended lab hours or open campus access
- Schedule multiple shorter sessions rather than one long block
Simply Technologies can advise on lab layout and scheduling to maximize equipment utilization. Even with one machine, strategic scheduling ensures everyone gets meaningful hands on practice.
How do I keep my CNC lab up-to-date on a limited budget?
Prioritize in this order:
- Safety-critical maintenance (never defer this)
- Software updates (often free or low-cost)
- Replacement of worn cutting tools
- New tooling or fixtures that expand capabilities
- Major equipment purchases
Build a multi-year equipment plan rather than making reactive purchases. Seek grants from manufacturing organizations, partner with local industry for donations or sponsorships, and join networks of schools sharing resources.
Simply Technologies can help institutions identify incremental improvements—like adding new tooling or fixtures—that significantly expand what students can learn without requiring major capital purchases. Sometimes a $500 investment in better workholding transforms what is possible more than a $50,000 machine upgrade.
Teaching CNC is ultimately about building confidence—for educators and students alike. The workforce needs skilled machinists, and your classroom is where that journey begins. Start with one project, learn alongside your students, and expand your program over time. Visit Simply Technologies to explore curriculum resources, training programs, and implementation support designed specifically for education.